In the past, I’ve delved in the blogging universe using Blogger, Tumblr, and even WordPress, but after a while, I fell disenchanted with what they offered.
I learned about GitHub Pages back in 2013 via the one and only Phil Haack (Dr. Jekyll and Mr. Haack), and now it is that I take the plunge and start experimenting myself.
So here is a guide on how I got myself started using GitHub pages.
Table of Contents
- Assumptions
- Getting started with GitHub pages
- Getting rbenv set up on macOS
- Installing a ruby version and setting a global version with rbenv
- Getting Jekyll on macOS
- Finding a Jekyll theme
- Editing and testing your Jekyll blog on your local machine
- Publishing your site and all future posts
- Extras
Assumptions
You are already familiar with GitHub and Git and know your way around the command line.
Let’s get started!
Getting started with GitHub pages
There’s a very comprehensive guide on how to get started with GitHub pages here or over here, but if you would like to create your posts locally, after you’ve created your repo, clone it on your computer, and continue with this guide.
Getting rbenv set up on macOS
You might know that macOS comes with ruby and python, but considering using them for your personal projects and messing with them is not recommended.
So this is where rbenv comes in and saves the day. And the Jekyll on macOS is a great step-by-step guide on how to set up Xcode, Homebrew, and rbenv on your macOS machine.
Just follow these steps:
- Install Command Line Tools for Xcode (link)
-
Install Homebrew
/bin/bash -c "$(curl -fsSL https://raw.githubusercontent.com/Homebrew/install/master/install.sh)" -
Install rbenv
brew install rbenv -
Set up rbenv integration with your shell
rbenv init -
Add it to your bash profile
echo 'eval "$(rbenv init -)"' >> ~/.zshrc -
Restart your shell so the path changes take effect
exec "$SHELL" -
Check your rbenv installation
curl -fsSL https://github.com/rbenv/rbenv-installer/raw/HEAD/bin/rbenv-doctor | bash
Installing a ruby version and setting a global version with rbenv
-
If you wish to list stable versions, use the
--listoption, or--list-alland pipe the results togrepto search for a particular version$ rbenv install --list-all | grep "2\.7\." 2.7.0-dev 2.7.0-preview1 2.7.0-preview2 2.7.0-preview3 2.7.0-rc1 2.7.0-rc2 2.7.0 2.7.1 2.7.2 2.7.3 2.7.4 jruby-9.2.7.0 -
Install the latest compatible version with GitHub Pages
rbenv install 2.7.3 -
Once installed, list all versions
rbenv versions -
Select your desired version
 rbenv global 2.7.3
 rbenv rehash
And you’re all set!
Getting Jekyll on macOS
After installing Xcode and Ruby, let’s go straight to installing Jekyll.
To install everything you need, and be compliant with gem versions used by GitHub Pages (found here), simply run the following command:
gem install github-pages
Now that we’re ready, let’s find a theme!
Finding a Jekyll theme
While you may use the options provided by GitHub, I found Beautiful Jekyll over at JAMstack themes.
The instructions are straightforward; found here.
Once you get it set up, open a Terminal session in your blog’s root directory and run the following command:
bundle install
This will install all necessary dependencies and get you one step closer.
Editing and testing your Jekyll blog on your local machine
I am using Visual Studio Code for editing my site, but you may use another text editor or IDE out there.
And after some customization I just run:
bundle exec jekyll serve
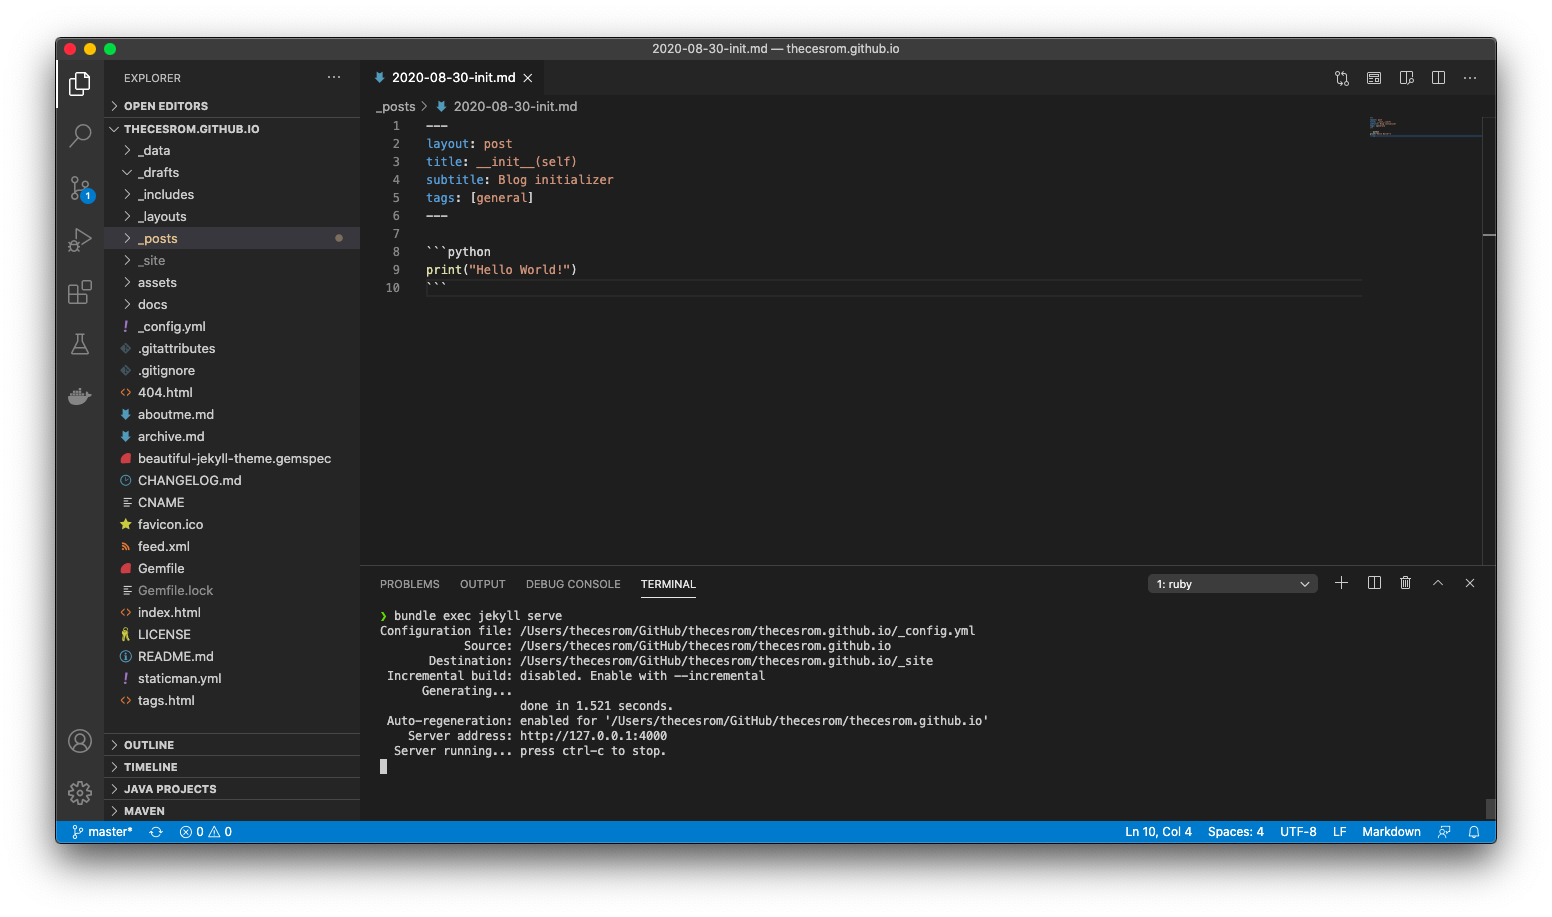
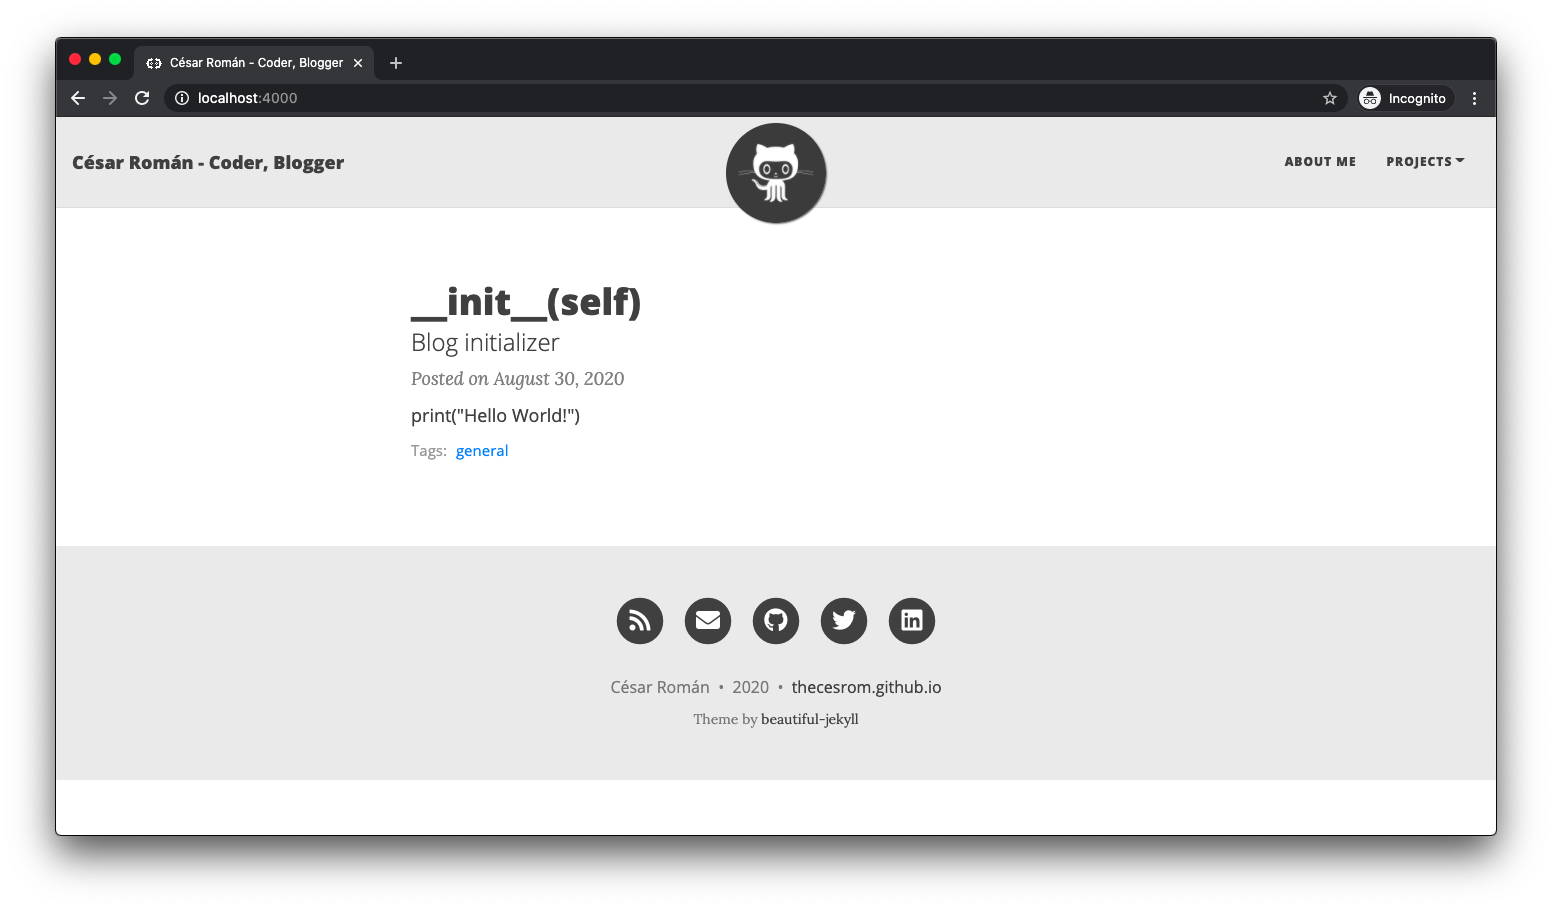
And my site is now live at http://127.0.0.1:4000/
And this is the final product:
Publishing your site and all future posts
With the power of commit and push you can accomplish anything.
Extras
Here are a few links and extensions that you might find useful:
- A Guide To Using GitHub Pages. Thinkful Programming Guides
- Visual Studio Code extensions:
Thanks for reading!